Keeping organized with DIY garden markers
You’ve started your seeds indoors in your tiny DIY pots and prepped your soil with a hearty offering of compost. Congratulations! You are well on your way to a productive garden this season. Before you transfer any seedlings or direct sow any seeds into the ground, take time to create the tools that will help keep your garden organized. Keeping track of plantings in a very small garden may be simple, but if your plot contains several different plants (and even more so, different varieties of the same type of plant) an organizational system becomes key.
Garden markers are a great tool that can identify your plants, track growing information, assist in weed identification, and add a little color or style to your garden beds. Here are some ideas for DIY garden markers, ranging from straight up functional to arts and crafts project.
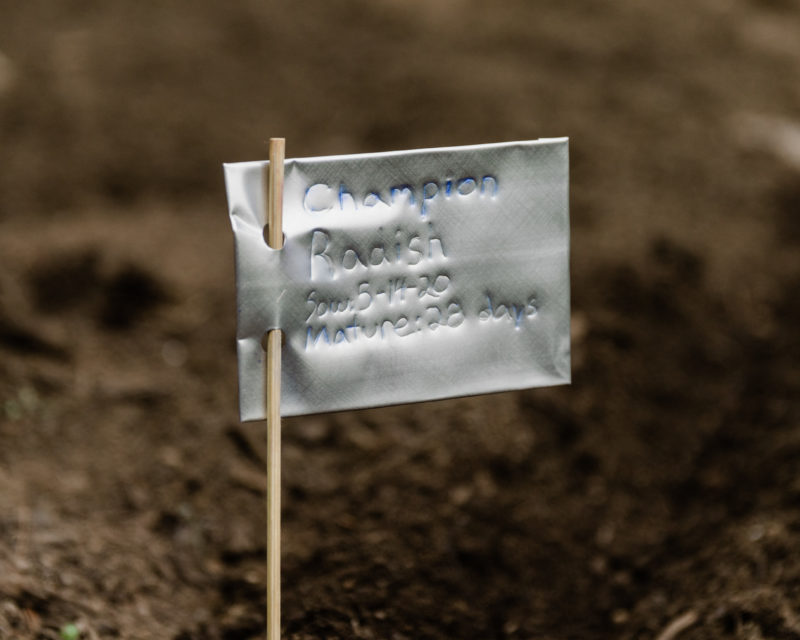 Aluminum tags – Avoid purchasing pricy plant labels by creating your own long-lasting tags from aluminum beverage cans. A can, a razor blade, and tin snips or old scissors are all you need, although a straightedge will help keep your labels uniform. Be sure to wear eye protection and cut resistant gloves! Etch your info into the front of the aluminum, or for a more finished look, etch it from behind. Attach labels to stakes or plants with wire.
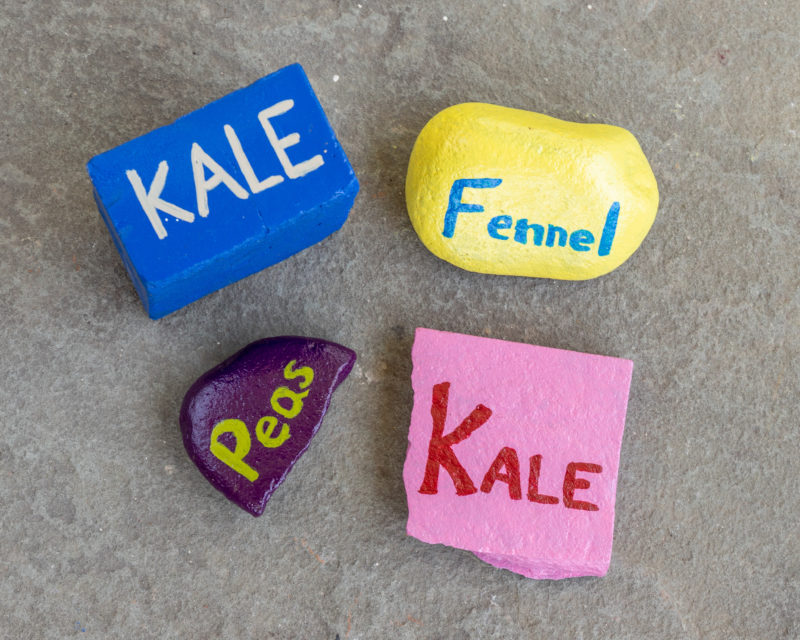 Painted found materials – Every good shed or garage has materials lying around that can be turned into garden markers. Bricks, smooth rocks or cut stone, or even broken terra cotta pots will work. Use any acrylic craft paint to label and decorate your marker and, once thoroughly dry, cover it with a clear UV-resistant waterproof topcoat. For the potshard labels below, we used industrial paint markers, which do not need additional weathering treatment. Bright colors look right at home in a family garden plot but this style can be elevated or, with large surfaces or fine-tip paint markers, accommodate additional planting information.
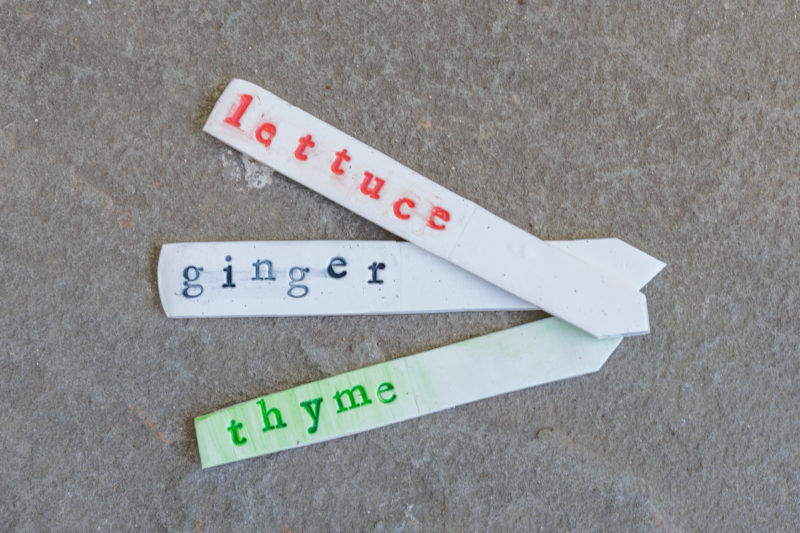
Stakes – These are the horizontal version of the painted rocks above – a simple label sticking upright out of the ground that made from a variety of materials. Natural materials, including branches and logs or bamboo fit nicely in a rustic garden bed. For a more modern look, roll air-dry clay into a ¼” slab and slice into ¾” stakes. Rubber alphabet stamps make the lettering uniform and markers or paint add a pop of color.
Tips and tricks:
- Paint markers work best on smooth surfaces. If you are writing on rough surfaces, consider buying extra replacement tips for a fraction of the cost of new markers.
- Paint markers contain solvent that can smudge painted materials. Use only on unpainted surfaces.
- Topcoat your creations with UV resistant clear gloss spray paint to extend the life of your masterpiece.
Share your #GardenMarkerCreations with us on Facebook and Instagram.